Monday, November 28, 2011

And the Winner is..... PLUS Cyber Monday Sale!

Okay, my friends.... have you had a great Thanksgiving weekend?  I sure did.  I only ventured out once on Black Friday.  To go to Michael's, of course, and pick up some delicious Christmas paper pads for a great deal.  Sweet!  Now, I have to make something with them.  Hmmm.... stay tuned for that one.

First, I must get down to some business.  Who has won the VDBC November Grab Bag?  It's only available for a few more days, and one lucky reader is getting it for free!  Let's see who it is.... I think that Random.org should have a little drum roll sound effect when I click the Randomize button.  They don't, so you'll just have to imagine a little drumroll right now in your head.  Go ahead, I'll wait while you summon it up...  Ready?

Drumroll please!

The winner of the VDBC November Grab Bag is...


Congratulations, Tammy Bartlett!  

You'll receive a message from either me or Chris shortly with details on how to claim your prize.  Yay, you!

Before you go, just wanted to let you know that my Super Cyber Monday sale is in full swing!  Get 40% off everything in the Sam & Hailey Designs section of the store.  If you head on over to my Facebook page, you might be able to find a coupon for additional savings if you look hard enough!


Also, be sure to look down on the next post.  I'm leaving my Thanksgiving Freebie up through the end of the day!

Time to get crafty, people!

Thursday, November 24, 2011

Happy Thanksgiving Freebie + Grab Bag GIVEAWAY!

It's the Sam & Hailey Designs
Black Friday Blowout Sale!
50% off Everything Sam & Hailey
Friday and Saturday only!  Shop early starting Thanksgiving Day, too!


Click to Shop Now!
Happy Thanksgiving to all!  I hope today you've given a few minutes thought to all the wonderful blessings in your life.  Here are my top 6 {not necessarily in order of importance}!

1. My Heavenly Father and my Savior, Jesus Christ
2. My hubby and kids
3. Grandbabies
4. Being together with my brothers and sister on Thanksgiving for the first time in years
5. My Mom and Dad
6. The fact that chemotherapy seems to finally be having a positive response for my Mom!  Best news I've had all year!

Okay, number 7 definitely has to be all of you!  Faithful blog readers, new friends, old friends, customers, and those who've just stumbled upon me for the first time.  You are all wonderful and I'm so grateful for you.  So, this weekend, In order to give back, not only am I having the amazing sale {see above}, I've also got a little die cut design to show you all how I feel.  I hope you can use it to show someone else how you feel about them!  After you've downloaded your freebie, be sure to keep reading to find out how you can get a chance to win the November VDBC Grab Bag GIVEAWAY!

This one would be a nice addition to a card or scrapbook layout.  Have fun with it!

Boring but Important Legal Stuff: My terms of use are included in each zipped download. If you have any questions about how you may use this file, please read it. By clicking to download the file, you are agreeing to abide by the terms. If you'd like to share it, please don't. Rather, send your friends a link to this blog post. Once it's no longer available as a freebie, you might be tempted to share it with someone. Please don't! 'Nuf said!

Sorry! This download is no longer available. Look for it and more in the Sam & Hailey Designs Store!


Okay, want to find out how you can win the fabulous November VDBC Grab Bag?  This is a grab bag chock full of awesome cuts.  Three from Sam & Hailey Designs, three from Show Me Scrappin' Cuts, and three from Chris Durnan!  Sweet!  If you already have this November Grab Bag, it's okay, I'll trade it in for a $7 gift code to the Sam & Hailey Designs store!  

Here's how to enter:

1.  Like Sam & Hailey Designs on Facebook (if you already do, that's okay, you can still enter).
2.  Leave a ♥ or type the word "Love" on the Sam & Hailey Designs Facebook Wall.
3.  Come back here and leave a comment saying that you did so!  Be sure to include your name and a way to contact you.  You'll want to leave your Facebook name in your comment so I can verify you completed steps one and two!  

This giveaway will be open until Sunday night 11/27.  One winner will be chosen at random on Monday from all entries that qualify!  Don't forget to do all three steps or you won't be able to win!

I hope you've all had a wonderful Thanksgiving and have a wonderful weekend!

Time to get crafty, people!

Monday, November 21, 2011

Make Your Own Monday: Shrink Charms

It's here isn't it?  Thanksgiving week!  Aaaaaaaahhhh!!

I sound so negative don't I?  That's terrible!

We're visiting my parents for Thanksgiving and I'm really excited about it.  So, why the negativity, you say?  Well, I've been saying it for a while... time is going by way too fast and Thanksgiving week means only just a few more weeks until Christmas.  I had hoped to have Christmas gifts put together to take to my family this week.  Nope, it's just not going to happen.  At the rate I'm progressing, they'll be lucky to get something by Valentine's Day.  

With that said, I'm probably not going to blog much this week.  I've definitely got a little something planned for Black Friday though, so stay tuned for that.  Other than that, this will probably be it for Thanksgiving week blogging.  There, I just rid myself of one thing on my to-do list.  I feel better already.

I couldn't let the week go by without mentioning the good happenings around our house.  Next Sunday is Hailey's 6th Birthday.  Happy Birthday, Hailey!  The poor girl was cursed to be born during the holidays.  That means that partying for her birthday is always last minute.  We decided last week that the only way we were going to squeeze a party in would be to do it this past Saturday.  I'm so blessed to have a wonderful best friend, Heather, who also makes amazing cakes.  So, I begged her to make me one.  She consented and I immediately regretted it when Hailey announced she wanted a Dinosaur Train cake.  Great, fondant dinosaurs? Heather is going to kill me!  Luckily, I found a motorized train set with some figurines and Heather was able to use that to decorate the cake.  I'm glad it relieved some of the pressure of decorating a last minute cake for me.  We called all of Hailey's friends on Friday and surprisingly 12 out of the 14 we invited were able to come!  We did dino face painting, jumped on the trampoline, whacked the crap out of a dino pinata, ate yummy cake, and opened presents. Before we knew it, the time was up.  In the end it was fun even for a last minute party.  Hailey was thrilled.  I'm not sure I can really believe that she is going to be 6 years old.

Aren't they just two of the cutest dinosaurs on the planet?

Happy realization for me?  Remembering that we have an every other year party rule... no big parties next year!  Yippee!

Okay, on to some crafty stuff.  I've been noticing a big resurgence of things made out of shrink plastic lately.  Remember Shrinky Dinks when you were a kid?  Well, now it's graduated from kids stuff to a "legitimate" crafter's material!  I have enjoyed using it for some time now.  I was just thrilled to discover a couple of years ago that my KNK MAXX digital die-cutting machine would cut the stuff!  An endless world of opportunities for shrinking cute things down to minuscule size opened up before me.  I thought I'd share one quick and fun technique for shrink plastic with you.

Today you will learn to make your own... Shrink Charms

The charms shown above are approximately 1" across.  Cute, aren't they?

A few notes before we get started:

I'm using my Itty Bitty Charms and Pen Doodles - Autumn Leaf digital cutting designs.  You can do your doodling by hand if you want.  You could even cut your charms by hand it you want.  The cutter is optional but makes this lots easier.

I'm using Transluscent Shrink Film by Grafix.  I love how it cuts.  Nice and smooth.  For a pen, I'm using a plain old fine point Sharpie marker.

For software and cutter I'm using the KNK Studio MAXX software with my KNK MAXX cutting machine. You'll want to check to make sure your cutter can cut shrink film before you try this.

Materials:
Shrink Plastic
Fine Point Permanent Marker
Die Cut Machine
Sticky Cutting Mat
Itty Bitty Charms (Optional)
Pen Doodles - Autumn Leaf (Optional)

1. Open your charm cutting design.  Make your charms the size you want them to be when you are finished shrinking them.
2. Size everything up 200%.
3. Overlay your pen doodle design on top of your charms.  I deleted out the parts I didn't need and moved a few things around.  Let your doodle design be larger than your charms so the lines spill off the edges.
4.  Get your machine ready.  Test cut your shrink plastic and draw with your pen tool so you'll know exactly what settings you need before you start.  Be sure you've got the pressure set correctly for your pen or you will squish the nib of your pen.  I've done this... sad!
5. Draw your doodle design with the permanent marker.  Position your starting point so that the rollers won't roll over your doodles.  It takes a while for permanent marker to dry and it will smear if the rollers go over it.
6. Cut your charms out.
7.  Carefully remove them from the mat.  The ink will be wet!
8. Shrink them via the manufacturer's instructions.
9. Ta Da!  Cute little guys aren't they?  Let them cool before you touch them.  They will be hot!

I also wanted to add that you can color these with Copic markers.  You'll have to wait until after they are shrunk though.  I tried a sample piece before and it just dissolved the marker lines.  After shrinking it worked fine!  If I get a chance to color some, I'll post a finished photo.

Here's a little portable version of this tutorial. Pin it or save it... whatever works for you!


Coming up... Some fun things happening on Black Friday!  There will be a freebie and giveaway this weekend along with a fantastic sale!  50% off everything Sam & Hailey!  See ya then!

Time to get crafty, people!

Friday, November 18, 2011

Fantabulous Friday Freebie: Thanksgiving Cupcake Wrapper Sample + Recipe

Weekly Wrap-Up:
Make Your Own Monday: Chevron Paper
Trendwatch Tuesday: Chevrons
Project Wednesday: Subway Art on a Shutter

Soooo..... Thanksgiving is really next week?  You aren't kidding me?  I know any moment I'm going to wake up and it will still be October.  Pinch me... please!

No?  Well, I suppose it's time to face reality.  And that reality is that I'm way behind on just about everything!

If you are feeling like me, be sure to check out the VDBC Annual Holiday Gift Giving Guide for quick and easy gift ideas.  It's so huge, we had to do it in two parts!

If you are going ahead with this "Thanksgiving is next week" concept, I might as well help out with a little recipe and a little free sample.  Who doesn't love free samples?  Oh, and there's going to be another BOGO deal in the mix, too.

First, I'd like to share with you the easiest and most delicious muffin recipe you'll ever taste, make, or lick the bowl from.  It's No-Measure Pumpkin Chocolate Chip Muffins.  It took longer to type that name thank it does to make them.  Seriously easy and hilariously delicious.  I'm also sharing my secret muffin baking methods.  I guess they won't be secret anymore.  But it's too good to keep to myself.


You may have seen as similar recipe floating around the pinterest-sphere.  That recipe insists that just the cake mix and pumpkin will make great muffins.  I'm sure they'll be fine, but I think the eggs are my secret ingredient for getting fluffier muffins.  I wouldn't make them without the eggs but you certainly can try.

And as for the chocolate chip addition... welll, duh!   What doesn't taste better with chocolate chips?  Okay, maybe a few things wouldn't but just go with me here.  They totally enhance the muffin experience, so put them in.

FYI, you can also substitute other cake flavors.  Spice is my favorite, though.


No-Measure Pumpkin Chocolate Chip Muffins

1 box Spice Cake Mix
1 can Pumpkin
2 eggs
1/2 bag of chocolate chips

Preheat oven to 400° F.

Combine the first three ingredients in your mixer and beat.  Stir in chocolate chips.

Fill muffin tins and bake for 10 minutes.  Reduce heat to 350° F and bake for 15-20 minutes longer.

Remove from muffin tins and cool on a wire rack.


Jan's Tips for Big Muffins

You know you want big muffins with a high dome, right?  But every time you make muffins they come out looking like measly little cupcakes, barely risen out of the pan.  Here's my secrets for getting the highest, fluffiest dome on a muffin.

1. Fill your muffin cups almost full (not 2/3 like some recipes will tell you).  This will require that you have a fairly thick batter.  If your muffin batter has a cake batter like consistency, add some more flour until it's more like brownie batter.

2. Fill any empty muffin cups with water.  The recipe above will make about 14 standard sized muffins.  If you only have 1 muffin tin that makes a dozen muffins, don't fill all the cups the first time around.  Leave a few empty and fill the empty ones with water.  A nice humid oven is good for muffins.

3. Bake the first 10 minutes on a higher temperature.  Then lower down to the regular temperature for the rest of the baking time.  Why does this work?  I have no idea, it just does, so I go with it.

Seriously, just look at the size of the dome on that muffin!

Now, what's a delicious muffin without a pretty wrapper?  I couple of weeks ago I tried making Pumpkin-Apple muffins using some pretty autumn patterned cupcake papers.  Wow, what a mistake that was!  The muffins stuck to the wrappers like undeserved fame on a Kardashian. Won't make that mistake again!  For Thanksgiving, how about cutting out some "post-baking" decorative Cupcake Wrappers!

This one is from my Cupcake Wrappers - Thanksgiving set.  So easy and so pretty!  Just pup the muffin inside and you've got instant eye candy.


Before I give away a little free sample, I want to let you know that if you buy the whole set of Thanksgiving Cupcake Wrappers from the Sam & Hailey Designs store this weekend, you'll get my Thanksgiving Placecards set absolutely free!  More fun and easy Thanksgiving decorations for free? Why yes, thank you!  I'll have seconds! Remember to get the deal, you'll need to put both of those products in your cart at the same time.  Don't make me have to track you down to give you your free file!

Okay, on to your free sample!  Gobble up this Pilgrim Hat and Leaf Cupcake Wrapper right now!

Boring but Important Legal Stuff: My terms of use are included in each zipped download. If you have any questions about how you may use this file, please read it. By clicking to download the file, you are agreeing to abide by the terms. If you'd like to share it, please don't. Rather, send your friends a link to this blog post. Once it's no longer available as a freebie, you might be tempted to share it with someone. Please don't! 'Nuf said!


This design will be up until Monday. Get it while it's hot! Click to wrap up your favorite file type:

Sorry!  This download has expired!  Look for this design and plenty of others in the Sam & Hailey Designs store!

Don't forget about that BOGO deal!  Only good through Monday!

Time to get crafty, people!

Linked at:

The Shabby Nest

Wednesday, November 16, 2011

Project Wednesday: Subway Art on a Shutter

Every once in a while I venture out of my hermit-like existence.  I like home.  I'm the epitome of the term Homebody.  When I do make it out, it's usually to go shopping.  I try to go with a purpose when I do shop.  Sometimes, like last week, I just feel like wandering the aisles.  Lucky for me, I did this at the local thrift instead of Walmart or Target.  Also, lucky for me, they happened to have some interesting things.  Like this sort-of-old shutter.  It was marked $4.  It really must have been my lucky day because all yellow tags were half of.  Score!  A $2 shutter!

My dear husband, if he were reading this, would roll his eyes and say... "Oh great, how I'm going to have an old shutter hanging around the garage."  Well... to him I say... Ha!  I actually did something with it!  "It's a miracle", he says... I know him as well as he knows me.

I decided that I would take one of the designs I made for the November VDBC Grab Bag and make a Subway Art piece for Thanksgiving decor.  SO, without further ado...

Today's project is... Subway Art on a Shutter
Here's my fabulous find from the thrift.  The paint job on the shutter was more bad-paint-job than vintage-paint-job.  So, I skipped the vintage look and went for sleek shiny painted look.  Either way works for me!  Just call me eclectic... really... do... I prefer it to scatterbrained or cluttered.
I first painted the side I plan to apply my vinyl to.  About 30 seconds into the paint job, the nozzle miraculously stuck open.  This might be a bad thing, but I used it to my advantage and painted the whole thing in one gulp {so to speak}.  It sure saved me from getting "spray paint finger" for which I am grateful.  Luckily, I was able to turn it off when I was done.

In all, it took two cans of paint to cover both sides of the shutter.  I think it turned out quite nice! Since I wasn't planning to actually use this as a shutter, I didn't bother taking any of the hardware off.  I just painted the whole thing.  Remember, deep down, I'm lazy.
After allowing the paint to completely dry, I applied some nifty vinyl decals to it.  I cut them from my Subway Art- Thanksgiving design.  This is only available as part of the November VDBC Grab Bag in case you were wondering.

I took each part of the design, sized it up, and moved it around so it would fit my shutter slats.  I absolutely love how it turned out.  Now the only question is... where to display it?  It's in my entry way at the moment. I like it!

Time to get crafty, people!

Linked at:
The Shabby Nest

get your craft on button

Tuesday, November 15, 2011

Trendwatch Tuesday: Chevrons

Another week closer to Thanksgiving and you know what that means.  Another week closer to Christmas!  Last Friday on Veteran's Day the girls were off school so we went and did a little Christmas shopping.  It was a relief to get a few things off my list.  I want to do a lot of handmade gifts this year.  It's kind of hard to do that for little kids though.  "A homemade wall art piece, gee thanks Grandma!"  Yes, I am a grandma, and yes, I do want my grandchildren to like me.  I bought toys.

Now that I've mentioned them, I just have to share a picture.  Here are our girls, Samantha and Hailey with their two nieces Zoey and Alana.  Aren't they just the cutest!  They didn't love the photo shoot much.  Thank goodness for baby cheetos.

I wish one of them was wearing chevrons on their dresses.  That's what we are going to discuss today!

Today's trend is... Chevrons

Been browsing around Pinterest much lately?  Chrevrons are quite the thing these days.  I've certainly been seeing it pop up in the paper crafting world as well as elsewhere in home design and fashion.  If you are thinking, great another trend that I will have to run out and buy stuff for, never fear!  Check out yesterday's Make Your Own Monday for a tutorial for DIY Chevron Paper!

In paper I've got a few choices for you:

Most notably, in my opinion is Echo Park Paper Co.'s many selections.  I like their basic chevrons in a variety of colors.
These basics are also available in dark and light pink, brown and green.  Echo Park also has some delightful chevron patterns in their holiday collections.  Holly Jolly has a green on green pattern and my favorite:
HJ20006 HOLIDAY WRAP
Another favorite of mine is from Amy Tangerine by American Crafts.  A couple of nice basics there:
Is It Any Wonder - Fabric Finish - 35556
Here and There - 35562
Okay, how about chevron use outside of papercrafting?  Have I got some finds for you!  Check out these tutorials I found for fun stuff to make with chevrons:

Create a Chevron Pillow on Make It Do:
Create a Chevron Background with October Afternoon... okay this is papercrafting after all.  But it does involve sewing and it is a tutorial.  I thought you'd like it:
A Painted Chevron Rug at Tater Tots & Jello:
Ombre Painted Chevron Curtains from Remodel Aholic:
Make a Chevron Pillow out of striped fabric on Dana Made It:

I sure hope this has inspired you!  Be sure to check out yesterday's little Make Your Own tutorial to make Chevron Paper!

Time to get crafty, people!

Monday, November 14, 2011

Make Your Own Monday: Chevron Paper

Happy Monday!  My house is so quiet right now... just the clickety-clacking of my keyboard. Silence fuels my creativity these days.  It seems like my mornings are the best time.  When the kids get home we immediately start hustling to get things done, then my piano students start arriving.  Then there's that horrible moment when I realize it's 5:30 and I have no idea what I'm making for dinner.  But mornings... ahhh....  it's my time to think and be creative.

Time for a little Make Your Own fun!

Today you will learn to make your own... Chevron Paper
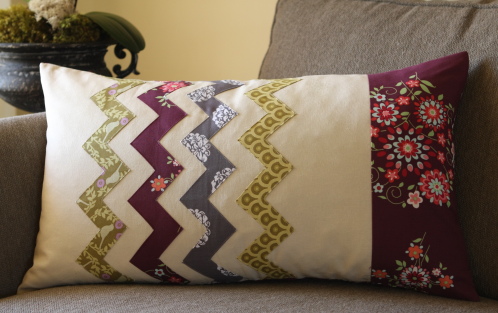
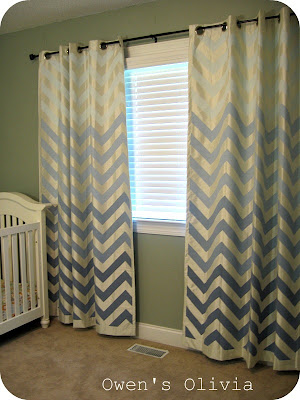
Chevron patterns are popping up all over the place.  Even here!  Check back tomorrow for my upcoming Trendwatch article about the popularity of chevron patterns in design and crafting.

I was looking through my own papers and realized, I have not one single piece of chevron paper! What?  It could be that it's been a while since I've purchased new paper.  The trend in paper seems to have just arrived.  That's my excuse and I'm sticking to it!

Anyway, since I didn't have any chevron papers, I decided, why not make my own?  And that's what I did!  It took a little experimentation and turning my brain on to figure out the best way to do it.  But eventually I figured it out.  And now I'm going to share the secret with you!  I've got two methods, using horizontal striped paper (or vertical depending on which way you hold it) and diagonal striped paper.  The diagonal striped paper is definitely easier and wastes a lot less paper.   You'll get a larger piece of paper in the end by using diagonal stripes, too. Why don't I share that with you first, then!

Chevron Paper from Diagonal Stripes

Materials:
One or Two sheets of 12x12 Diagonal Striped Paper
Paper Trimmer
Adhesive
1.  If you only want to use one sheet of paper, first cut your sheet into 6x6 squares.  You'll only need two squares and will get one sheet of paper about 5.5x10 in size.  If you use two 12x12 sheets of paper, you should be able to get two large sheets of paper at least 10x11.5 in finished size.  For these photos, I'm using two 6x6 pieces of paper.
2. Cut one of your squares of paper into strips.  I made mine about 1.25" wide.  The wider your strips of paper, the wider your chevrons will be.  Here is the really, really important part so listen up.... You must turn your second sheet of paper 90 degrees before cutting it!  You want your stripes to be going the opposite way or when you glue them together you'll end up with paper that is still just diagonal stripes!  Look at the two sheets sitting side by side up there in that first picture to see what I mean.
3.  Lay your strips down in an alternating pattern.  See the chevrons starting to show up?
4. Glue your strips together overlapping them slightly.  You'll want to make sure your patterns match up as you go along.
 5.  Tada!  Now go and trim the uneven edges off!
Here is my finished piece of chevron paper. Mine turned out about 5.5x10.  Remember, this is from one sheet of 12x12 paper.  You'd get a much larger result if you used two sheets of 12x12 paper.  I realize now that over there on the left hand side I should have trimmed about 1/4" off so that the pattern matched.  Looks cool though, doesn't it?

Here's your "to-go" copy of this tutorial.  Click on it to grab it, save it, or why not pin it?


Okay, that's method #1.  Method #2 uses horizontal/vertical stripes.  It's probably the more common paper to use.  If you are looking for a decent sized piece of paper at the end to do something other than cardmaking with, I'd suggest you use TWO sheets of 12x12 paper rather than taking one and cutting it into squares.  You can still do that, it will just be a much smaller end result.  This method is a little trickier because you'll have to cut part of it by hand with either scissors or an xacto knife.

Chevron Paper from Horizontal Stripes

Materials:
One or Two sheets of 12x12 Horizontal Striped Paper
Paper Trimmer
Scissors or X-Acto Knife
Adhesive

1.  Start with two sheets of 12x12 paper, or cut one sheet into 6x6 squares.
2.  Cut one of your sheets in half, diagonally, from corner to corner.  You'll probably find this won't fit on your paper trimmer.  This is where those scissors or xacto knife come in handy.  I folded my paper in half and used a pair of scissors to cut along the fold.
3. Cut your paper triangles into strips.  Since I used a wide stripe, I decided to use my paper trimmer and just cut as narrow as I could without damaging my paper.  This turned into about 3.75" wide.  Since I was using a wide stripe, this was just fine.  If you are using a narrow striped paper, you'll probably need to use that xacto and a ruler to cut those strips.
 4.  Cut each strip the same size.  Discard any little leftover bits.
5.  Do the same for the other piece of paper.  Before you run off and do this, you must listen up here!  You have to turn your second piece of paper 90 degrees before you start cutting.  If you don't, this will not work!  You'll just end up with diagonal stripes and then you'll be all mad at me.  It won't be my fault if you don't listen!
6.  Lay your paper together, alternating the stripe direction.  You'll want to use your longer center strips for this.
7.  You can make smaller pieces out of any shorter sections.
 8.  Glue the strips together with some tape or other adhesive.
 9.  Overlap the edges, making sure you match the stripes up exactly.
 10.  Here's your finished piece... almost!  Trim up the edges so you have a finished rectangle.
Now you have a finished piece of chevron paper!  Mine turned out about 8.75x14.  You may get different results depending on how wide your stripes are and how wide you decide to cut your strips.

Here's your portable format!  Just click to enlarge and save.

Now, run off and make yourself some stylish and trendy chevron paper!  Don't forget to stop back tomorrow for my Trendwatch Tuesday article about chevrons!

Time to get crafty, people!

Linked at:

get your craft on button


Linked at:

The Shabby Nest


Related Posts Plugin for WordPress, Blogger...